When it comes to household maintenance, ensuring you have clean, soft water is essential. Hard water can cause myriad issues, from buildup in pipes to less effective soaps and detergents.
For homes with a well, adding a water softener is a common solution.
This guide will help you understand the process of how to install a water softener with a well to improve your home’s water quality.

Hard water contains high levels of minerals like calcium and magnesium, which can lead to limescale buildup and impact water-using appliances.
Installing a water softener can prolong the life of your plumbing and improve water quality.
Doing it yourself can also save you money. Let’s get started on how to install a water softener with your well.
💦 How To Install A Water Softener With A Well?
First, pick a spot near where the water line enters your home. This will likely be in a basement or utility area.
Make sure there is a nearby outlet and drain, as the softener will need power and a place to discharge during regeneration cycles. The chosen spot should also be dry, level, and out of direct sunlight.
Water Testing and Softener Selection
Before purchasing a softener, you need to know the hardness level of your water. You can get a test kit at most hardware stores. With this information, you can choose the proper size and type of softener. Your softener size depends on your water usage and the hardness of your water.
Installing the Bypass Valve
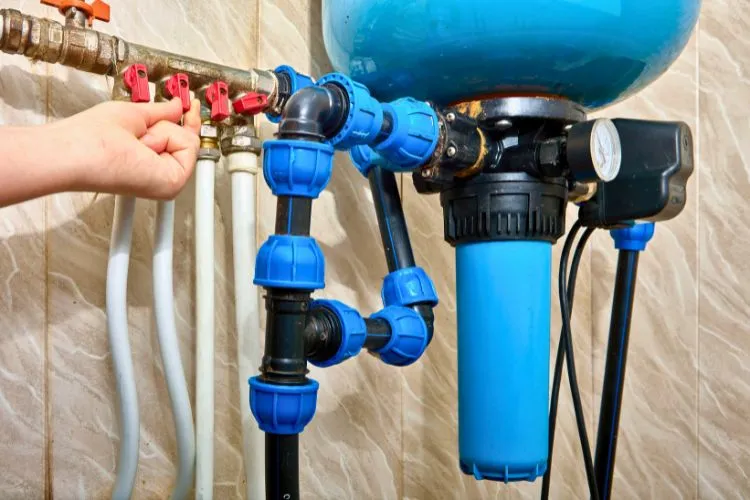
A bypass valve lets you cut off water to the softener without stopping your home’s water supply. To install it, turn off your water main and drain the lines.
It usually involves connecting the valve to the main water line with compression fittings. Follow the manufacturer’s instructions closely.
Connecting the Water Softener
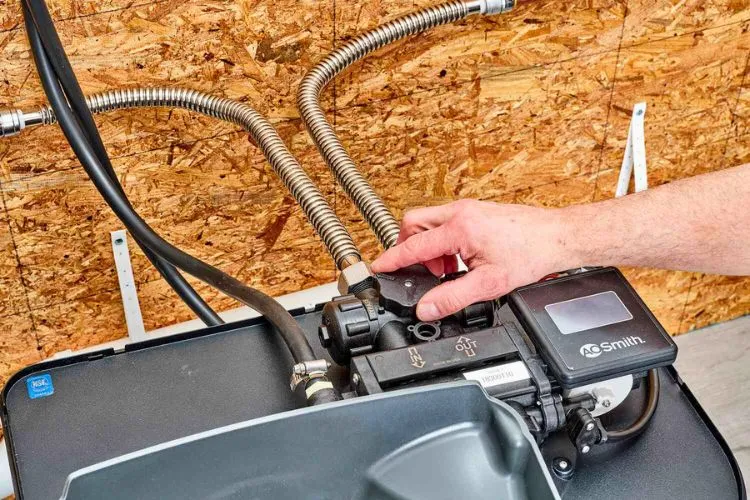
With the bypass valve in place, you can connect the softener unit itself. This involves cutting into your main water line and attaching the pipes to the softener with more fittings.
Make sure all connections are secure to prevent leaks. Use plumber’s tape on threads to ensure a tight seal.
Setting Up the Brine Tank
The brine tank is where a highly concentrated solution of salt or potassium is stored. Fill the tank with salt according to the manufacturer’s instructions. Be careful not to overfill, and set the float to the correct level to avoid problems.
System Start-Up and Settings Adjustment
Now, you can turn on the water main and check for leaks. Plug in your softener and initiate a regeneration cycle to check the system’s functionality.
Adjust the settings on the softener’s control head according to your specific water usage and hardness. This customization will ensure your softener runs efficiently.
💦 Maintenance and Troubleshooting
Generally, the primary maintenance your water softener will need is refilling the salt in the brine tank. How often will depend on your softener and water usage.

Keep an eye out for changes in water quality, as they can indicate issues with the softener. Check the manufacturer’s guide for troubleshooting steps.
💦 How to Properly Dispose of Waste Water?
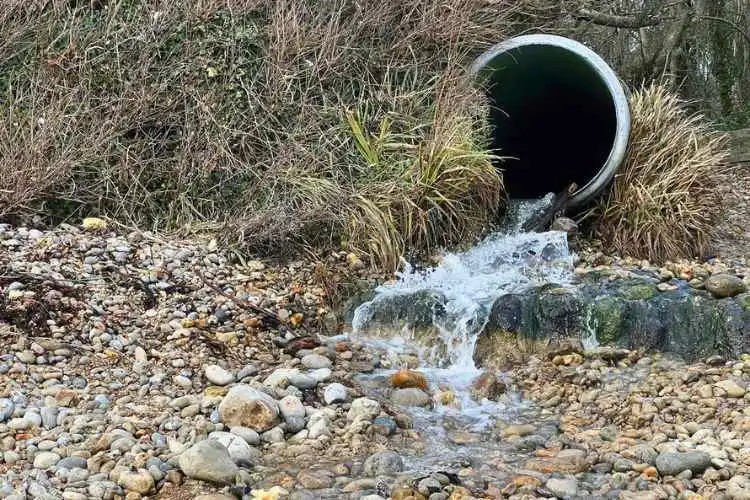
Proper disposal of waste brine solution from a water softener during regeneration cycles is critical for environmental protection and compliance with local regulations. The brine, a salty solution rich in minerals like calcium and magnesium, must be handled responsibly.
The most common method is to connect the water softener’s discharge line to a sanitary sewer system, allowing the wastewater treatment plant to process and remove the salts before releasing the water back into the environment.

However, it’s essential to consult local environmental and sewage regulations before doing so, as some areas may have specific requirements or restrictions against such discharges due to the potential impact on local water treatment processes and ecosystems.
For areas without access to a sanitary sewer or in regions with strict limitations, alternative methods such as evaporation ponds or discharge to a leach field may be considered, provided they meet local regulatory approvals. These methods allow the brine to naturally dissipate without harming the environment.
Regardless of the method chosen, it’s crucial to ensure that disposal practices do not negatively impact soil, groundwater, or surface water. Regular monitoring and maintenance of the discharge system are also vital to prevent leaks or blockages that could lead to environmental damage.
💦 Water Softener Configurations for Different Types of Wells
When configuring a water softener for homes with well water, several well-specific factors need to be considered to ensure optimal performance and longevity of both the well system and the softener.

- Well Depth: Deeper wells may have higher mineral concentrations, necessitating a water softener capable of handling higher levels of hardness. Testing water directly from the well will guide the appropriate softener capacity.
- Pump Type: Submersible pumps, common in deeper wells, can produce a higher immediate flow rate than jet pumps used in shallower wells. This factor influences the required flow rate capacity of the softener to prevent loss of water pressure.
- Water Yield: The well’s ability to replenish affects the volume of water available for softening. Low-yield wells may require a storage tank system in conjunction with the softener to ensure adequate water supply during high usage periods and regeneration cycles, without overtaxing the well.
Selecting a water softener with adjustable cycle times and regeneration settings is beneficial, particularly for wells with fluctuating mineral levels or yield. Additionally, for well water with specific contaminants like iron or sulfur, a softener designed to address these issues, possibly with a built-in filtration system, is advisable.
Tailoring the water softener to these well characteristics ensures efficient, effective softening and prevents potential system strain or water quality issues.
💦 Frequently Asked Questions (FAQs)
Can I install a water softener myself?
Yes, if you are comfortable with basic plumbing and carefully follow instructions, you can install a water softener.
How often should I add salt to the brine tank?
Check monthly, but how often you’ll need to add salt will depend on your specific water usage and softener model.
How do I know if my water softener is working correctly?
Your water should feel slippery, soap will lather better, and there should be no buildup on appliances.
💦 Ensuring Optimal Performance and Longevity
Maintaining the efficiency and lifespan of your water softener involves more than just regular salt refills. To ensure optimal performance, consider these additional maintenance tips:
Regular Cleaning of the Brine Tank: Over time, the brine tank can accumulate impurities and debris, leading to a drop in performance. It’s advisable to clean the tank annually.
Empty the tank, scrub the sides with a mixture of water and dish soap, and rinse thoroughly before refilling it with salt.
Resin Bed Maintenance: The resin bed, which is responsible for exchanging ions and softening the water, may occasionally need attention.
Iron and other minerals can foul the resin beads, reducing their effectiveness. Using a resin cleaner can help rejuvenate the resin bed and maintain its efficiency.
Checking for Salt Bridges and Mushing: Salt bridges, hardened crusts of salt, can form in the brine tank, preventing the salt from dissolving properly. Use a broom handle to gently break up any salt bridges.
Similarly, salt mushing, a sludge-like build-up, can interfere with the regeneration process. Regularly inspect and break up any clumps to ensure smooth operation.
Monitoring Water Usage and Softener Settings: Keep an eye on your household water usage and adjust the water softener settings accordingly. If your water usage increases, you may need to reconfigure the softener’s regeneration cycle to keep up with the demand.
Inspecting and Replacing Filters: If your water softener system includes pre-filters or post-filters, check them regularly and replace them as needed. Clogged filters can reduce water pressure and affect the overall performance of the system.
Protecting Your System from Freezing: In colder climates, ensure that your water softener and its components are protected from freezing temperatures.
Insulate pipes and tanks, and consider installing the system in a heated area to prevent damage.
Professional Servicing: While DIY maintenance can go a long way, scheduling a professional servicing every few years can help identify potential issues before they become major problems.
Professionals can perform thorough inspections and provide expert maintenance to keep your system running smoothly.
By following these maintenance tips, you can extend the life of your water softener and ensure it continues to provide high-quality, softened water for your home.
Conclusion:
By following these steps, you can install a water softener and enjoy the benefits of soft water. With careful planning and a methodical approach, a DIY installation is within reach for those willing to take on the challenge.

Devon Shorts, a seasoned expert with over a decade of experience in water safety, shares valuable insights on this blog “Aqua Safety Plus”. Trust his expertise to keep your water clean and your family safe.
